Summary
- Why would you build an electric bicycle!?
- Budget
- The Plan
- Buying the parts
- What did I buy and how much did it cost?
- In the next article
Disclaimer
In this series of articles, I’ll describe my journey into building an electric bicycle. Those articles, including the reverse engineering part, are not meant as a guide to building your own. I offer those resources in detail for educational purposes, and I cannot be held responsible for any consequences resulting from using the material I provide.
Why would you build an electric bicycle!?
One day, I was coming back home after playing bowling with my friends. One of my friends brought their electric scooter, and as a technology lover, I had to take a look and try. It was amazing. The idea of having one started to be seducing! Then, we were on our way to my place. Me on my bicycle, them on their electric scooter, top speed 45km/h.
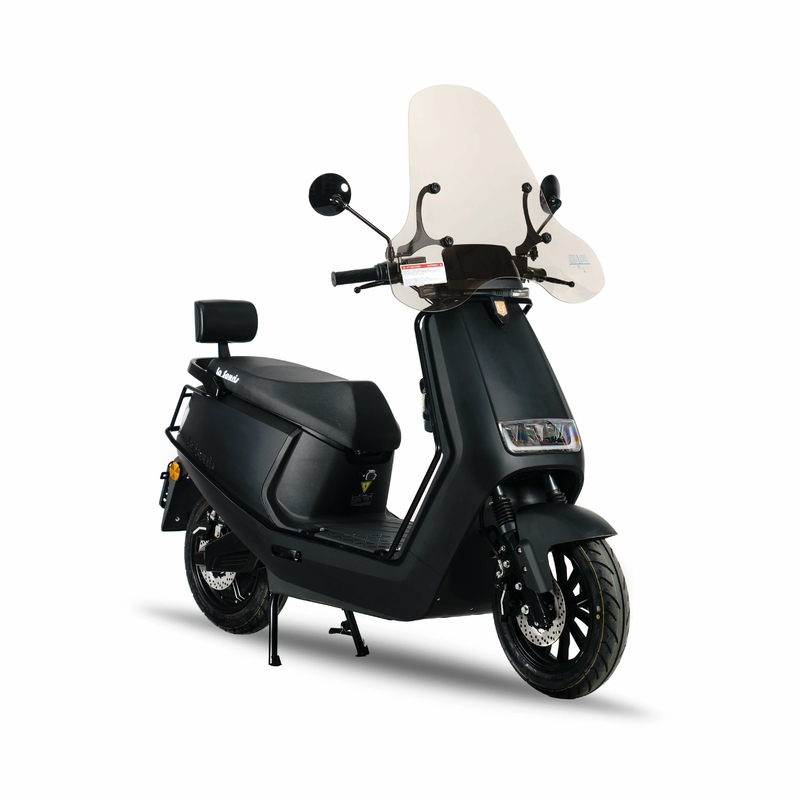
My good ol’ year-old half-city half-mountain bike vs the 45km/h scooter.
Now, one thing you need to know is that I live in the Netherlands, and here, well-built bike lanes make it very practical to move by bike. Guess who arrived first? You’re right! (or wrong, I don’t know, I don’t read minds), the electric scooter did arrive first. But only by a few minutes.
A seed was planted in my mind: Owning an electric bicycle.
The landscape of electric bicycles is broad and I quickly discarded buying because the ratio performance/price is ridiculous. Sure their design is elegant, but the range is usually terrible for the price. And I started to wonder, if not buying, how could I own an electric bicycle? (no, there is no electric bicycle national lottery here!)
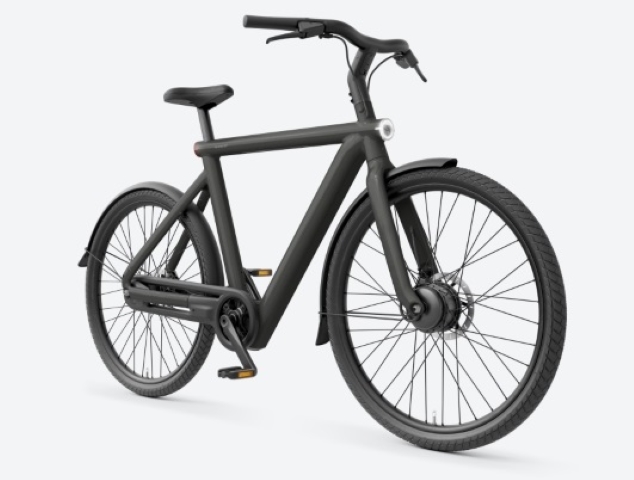
You can buy an expensive, unnecessary complicated, and stylish bike, or you can
build a better one, for less than 1/3rd of the price. Also, you can repair your
homemade bike yourself if the company that sells it goes bankrupt.
Another seed got planted in my mind: If I could build an electric bicycle that has a decent range and a slightly higher average speed than my bicycle, I would have the perfect vehicle for longer-range and easy travel.
Did I need an electric bicycle? No.
Did I build one for the fun of it? Yes!
Budget
1k euros.
That’s it. That’s how much I wanted to pay for everything. The reason is simple, I received this money from something I signed an NDA for (So, no details here, sorry!) and I didn’t want to spend more than that. It’s arbitrary but you’ll see that my ballpark was right.
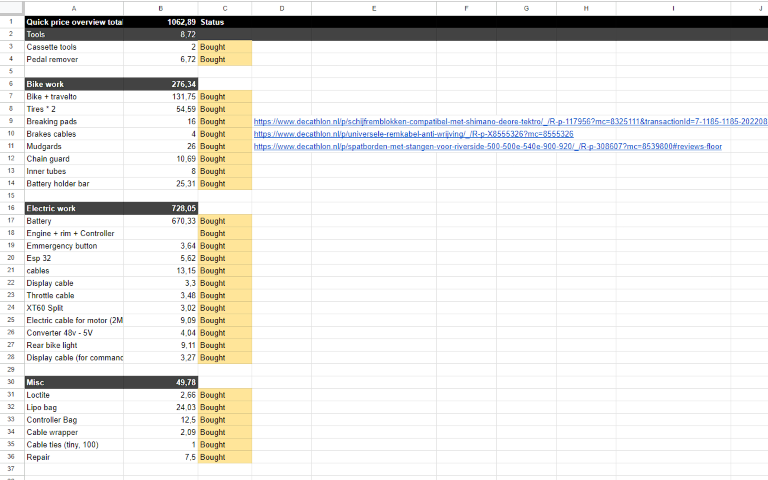
Spreadsheet, your best ally to lay down a budget!
The Plan
To build an electric bike, you need to only consider 3 things:
1) What frame are you converting?
I find electric bicycle frames too bulky, and unnecessarily heavy.
I like my bicycle, it is light, has front suspensions, disc brakes, and 28″ wheels. I decided to get the same frame second-hand and convert it to an electric bicycle.
It’s important to select a good, sturdy frame you trust (good material that ages well). Disc brakes are mandatory in my opinion and experience. Anything else depends on preferences, 28 inches wheels allow for a decent speed, and no middle suspension is required because I live in flatland (and also it consumes some of the energy you put in pedaling, imagine with a dead battery…).
2 similar bike frames, but only one would end up being the electric one. But which one?
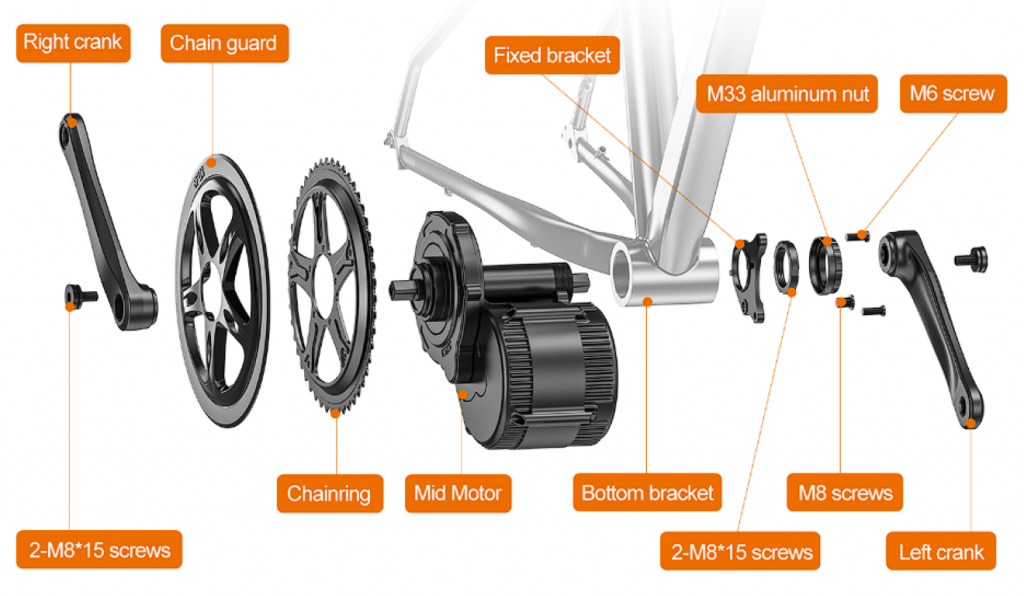
2) What motor do you need?
There are 2 main types of motors. Inside direct drive hub motor (inside the wheel) and middle drive. A middle engine acts on the chain (just like when you’re pedaling). In my opinion, mid-drive engines are only a valid choice in mountain-like areas, because they allow you to change gears and climb more easily. Using the chain means losing energy in the transmission thanks to friction, and I like efficiency (that’s why you should take care of your chain, a rusty chain means more frictions which means more energy wasted which means more pedaling!).
I therefore selected a direct drive hub motor.
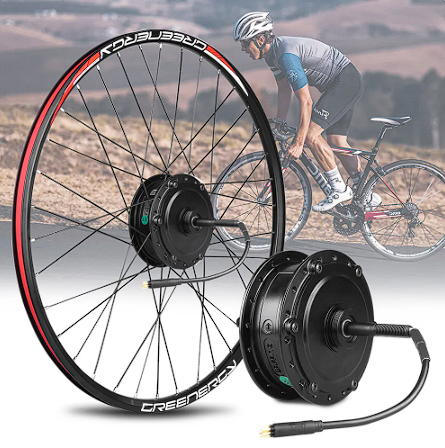
Direct drive motor on the left, mid-drive motor on the right.
But what about the Power?
The rated power of the engine is an indication of acceleration if the motor has a hard time on slopes and some sense of the speed you could reach. However, those are only useful if you get information from a manufacturer (2 different 250 Watts motors might not perform the same).
An important note on motors, in Europe, most countries only allow 250W engines. Anything above is illegal.
This is why you only find 250 Watts motors on bicycles sold in stores. They are limited by regulations. Most 250W motors will get you to speed around 25-30km/h (especially in the Netherlands), so they are more than enough, it’s a different story if you live in the mountains and have a direct-drive motor. I’m not going to tell you which motor power rate I chose, and I recommend the 250w one… 😉
3) What battery do you need?
Most batteries for e-bikes are Lithium-ion. This is a relatively safe technology and we only care about the amount of energy it can store right now. Usually, it’s Ah, Ampere hour. The more Ah you have, the longer your motor runs and the more range you have. However, it’s impossible to know how many kilometers you will reach with a specific battery if you don’t know the wheel size, power rating, and average speed.
Just know that you can roughly know for how long you can use your motor at its rated power. With a 250W engine and a 5.2Ah (48v) battery, you can run your engine at 250w for 1h (5.2 * 48v = 250 Watt Hour (Wh) | 250Wh / 250W = 1h). Theoretically. In reality, you don’t want to discharge your battery down to 0 (it damages it), and your engine might be rated 250, but can also peak at 300w.
It’s important to note that you have different voltages for e-bike batteries (36v, 48v, 52v). In my opinion, 36v is a bit outdated now, 48v is a sweet spot (not too expensive, allows for better accelerations), and 52v is great but not so common yet.
I went for a big battery (48v, 20Ah, 960Wh).
Don’t forget that you’ll have to fit the battery on your frame. The most common type of battery is the “Downtube” battery, installing them doesn’t require extensive work.
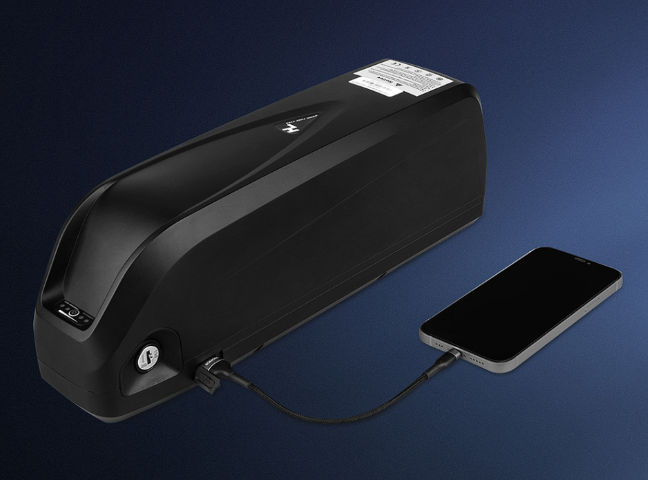
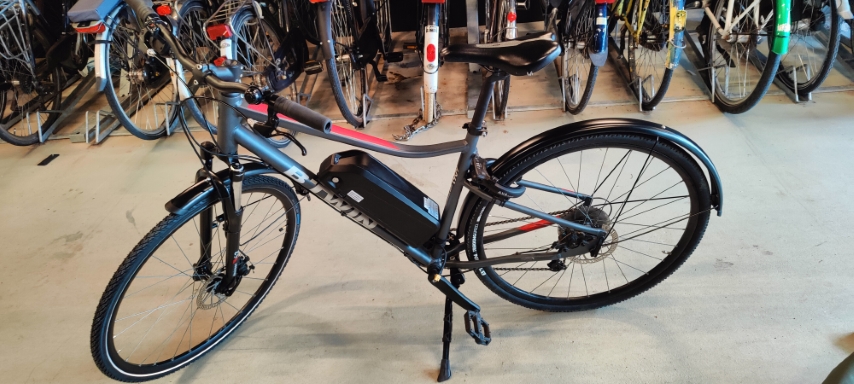
This is a very, very big battery. It barely fits my frame!
I wanted a little extra… 🙂
The speed limit for e-bikes in most countries in Europe is 25km/h. This is quite fast in a city-like, crowded environment. However, it’s very slow in the countryside, on empty bike lanes. I wanted a system to switch between limited and unlimited speed mode as well as having a speed throttle. I’ll develop this part in the next article, focused on programming and reverse engineering!
Buying the parts
Now, if we were to buy only the frame, motor, and battery, we’d have an ugly very much nonfunctional bicycle! I bought most of my parts directly from China. However, I don’t like to promote specific websites, so feel free to comment if you need links.
When buying, the most important thing, and I can’t stress this enough, is to put your money in the battery. Saving on the battery is dangerous and you could get a fake, badly built battery that could catch fire. My battery was about 400 euros. Of course, price is not the only factor. Verify the seller and consider your choice carefully. There has been a rise in battery fire (when charging) in homes, and trust me, you don’t want a powerful fire generator in your living room. For that reason, I also bought a lipo fire bag. This is not preventing fire, it’s giving time to put the battery outside in case something happens.
When buying the core parts (battery, motor, controller, display), if you’re not buying a kit, be very careful about the compatibility between those parts and what cables the controller is offering (waterproof, cables for lights…). For safety, I suggest paying attention to consumables for the brakes, and buying good quality, puncture-free tires, if possible rated for 25+ km/h. The most important part besides the battery is the battery holder bar, which allows a more secure attachment of the battery on the bicycle.
To build the functionality for changing the speed limitation, I needed something to communicate directly with the motor controller. I decided to go with an ESP32 microcontroller because it’s robust, has plenty of functions, and is quite cheap!
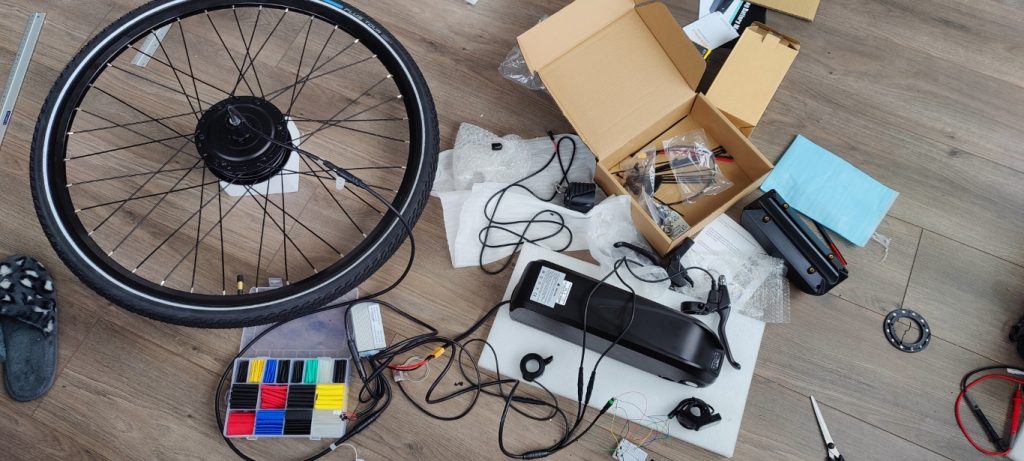
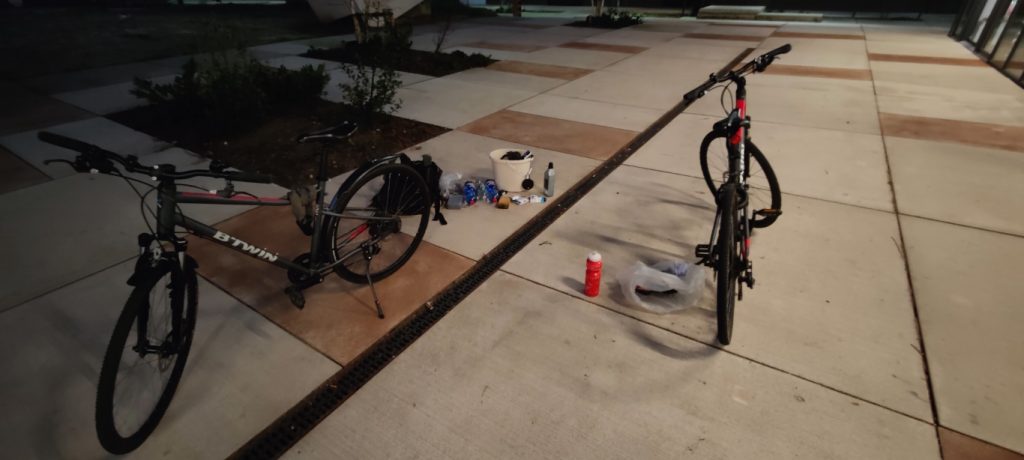
Lots of parts, and not everything is in this picture. Those are just the core parts.
What did I buy and how much did it cost?
Here’s the entire list of the parts and services I bought, including parts to fix later issues.
| Total costs | 1062,89€ |
|---|
| Tools | Total: 8,72€ | What is it / Why / Comment |
|---|---|---|
| Cassette tools | 2 | Tool to remove the cassette (gears) on the wheel and place it on the motor. |
| Pedal remover | 6,72 | Tool to remove the pedals (to install a sensor) |
| Bike frame and parts | Total: 276,34€ | What is it / Why / Comment |
|---|---|---|
| Bicycle frame | 131,75 | 2nd hand. |
| Tires * 2 | 54,59 | New, anti-puncture tires. |
| Breaking pads | 16 | Replace old breaking pads. |
| Brakes cables | 4 | Replace old cables. |
| Mudguards | 26 | Replace mudguards with better ones for higher speeds. |
| Chain guard | 10,69 | The frame didn’t have it. |
| Inner tubes | 8 | Official ones for the 28-inch wheels. |
| Battery holder bar | 25,31 | Very important part to fit the battery on the frame |
| Electric work | Total: 728,05€ | What is it / Why / Comment |
|---|---|---|
| Battery + Motor+ Rim + Controller + Display | 670,33 | An all-in-one kit with a cheap price tag! The rim includes the motor. |
| Speed buttons | 3,64 | Additional button module to switch between unlimited and limited speed. |
| ESP32 | 5,62 | Micro-controller used for specific commands related to speed limits. |
| Cables | 13,15 | Generic electronic cables to build an electronic board. |
| Display cable | 3,3 | Cable for the display of the bicycle controller to link the display and the ESP32. |
| Throttle cable | 3,48 | Electric Throttle cable, same as above. |
| XT60 Split | 3,02 | Electric connector and cable for battery and motor. |
| Electric cable for motor (2M) | 9,09 | Generic electric cable for high intensity. |
| Converter 48v – 5V | 4,04 | Converter to power the ESP32 with the battery of the bicycle. |
| Rear bike light | 9,11 | I like people in cars to see me cycling at night, so they don’t drive over me! |
| Display cable (for commands) | 3,27 | Cable to connect speed buttons to ESP32. |
| Misc | Total: 49,78€ | What is it / Why / Comment |
|---|---|---|
| Loctite | 2,66 | Liquid to lock loose screws. |
| Lipo fire bag | 24,03 | Fire prevention in case of battery defect. |
| Controller Bag | 12,5 | Nice looking bag for the controller including a phone holder. |
| Cable wrapper | 2,09 | For cable management and look. |
| Cable ties (tiny, 100) | 1 | To tie cables on the frame. |
| Repair | 7,5 | I broke a thread thanks to my low-quality pedal remover tool. This was a tip because the bike mechanic who fixed it refused to make me pay. |
So all in all, I’m 62.89 euros above my budget, which is… Not surprising and quite okay! A bicycle requires maintenance just like any other vehicle, and it will cost more, but by buying good components you lower the maintenance frequency and chances of part breaking.
In the next article
In the next article, I’ll dive deeper into the construction of the bicycle. I’ll mainly talk about fitting the parts on the bicycle as well as the conception of the “Second brain” of the bicycle.
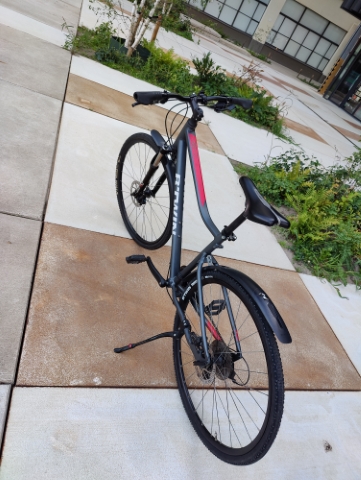
Now, you’ve been patient enough to read the entire article, and as a way of thanking you, here is a picture of the final bicycle as I currently ride it!
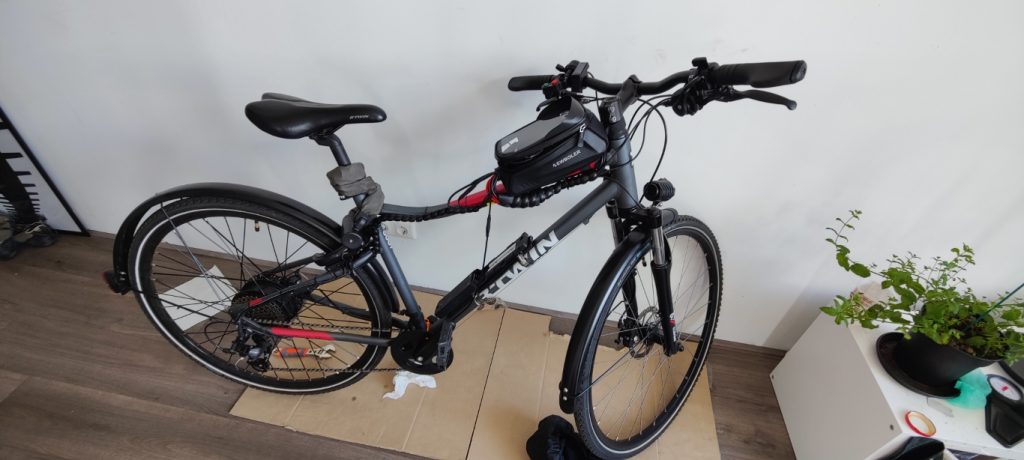
The battery is missing but I think it looks pretty slick!